After planning out each shot of the music video, i then began production. I filmed my shots in a variety of places, the JCG media room (green screen), various streets of Jersey, gardens, parks houses etc. Once gathering enough footage, I then decided to start editing.
For my editing, I used an Apple Mac and the software iMovie HD.
I began by uploading all of the clips i had filmed into iMovie.
I started by creating the silent introduction that is not accompanied by the track. This would help me know where to put the music. I started by draggin the clips into the timeline in the correct order.
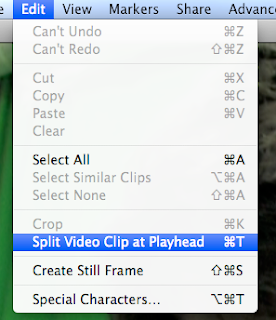
I then use the split tool to cut my clips to the appropriate length, so that my music video had conventional continuity editing.
After i was satisfed with the cuts, and that the clip rolled together well, i then imported the music track, to the part of the playhead that i wished for it to start. this would give me a outline of the timings for the clips to follow.
The first shot to edit together with the music was the 32 beat scene (as explained in planning). This required the majority of shots edited together within the space of 12 seconds, all with precise timing, making this one of the hardest bits of editing. By building the clips up in order, and cutting them to the correct length, i was eventually able to get the timings correct.
To create the effect of the sky changing from grey to blue, i used the video effect tool gamma adjust on the clips of the sky that i had filmed.
Once cutting the rest of the clips together, it was time to create the green screen background.
Creating the green screen backdrop
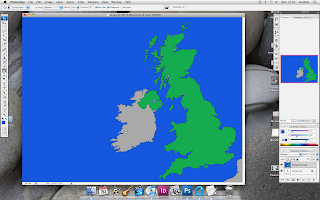
To create the backdrop, I started by getting an image of the UK, from the internet, then editing it so only the outline of the image showed, using photoshop, as shown below.
I then used photoshop to colour the image in, creating a large blue space to the left of the UK, where the weather man can stand, making sure that the ratio of the image would fit the green screen.
After doing this, I then created cartoon images of the sun and clouds that would eventually layer on top of the UK image.
To create the animation, i used Macromedia flash. I started by putting in the background image.
I then created a time scale appropriate to the length that it was in shot for, adding the other 2 images a variety of times to give the impression of a weather forecast.
I then created different layers so that the images would appear one at a time, in beat with the music.
To create the motion of the clouds moving off the screen, I used a motion tween for the cloud layers, making them all move in unison.
I then had my full green screen backdrop, which i exported as a movie file. The video below shows how I applied this effect to my greenscreen shots:
VIDEOS WONT UPLOAD (ask to see at school)
VIDEOS WONT UPLOAD (ask to see at school)
Another particular tricky shot to edit was the screen spilt into 3 sections for the chorus of the song. Below is a video showing how this was done:
VIDEOS WONT UPLOAD (ask to see at school)
Once i had finished putting all the clips together, i began working on the finishing touches. I added certain transitions in various places for various effects, such as the impression of time passing etc by using a fade in and fade out. Also, the Circle Closing effect is used specifically in a shot to give the impression of the forecast being turned off, going with the narrative of the story.
To co-inside with the video fading out, i decided to fade out the end of the track, by lowing the audio bar slowly.
The last touch I added to the video was to place a title at the beginning, a convention i picked up from my research. I did this from the Title option, which one of them happened to be Music Video.


No comments:
Post a Comment